Tutorial 05: Custom FUI Interface – Swarm Detection
This is my first tutorial on YouTube. So, hello everyone!
The idea to make this design, came up to me, when I saw this post on Instagram by Motion Graphics Collective. Design was made by Florentzunino. I liked the dots and vintage look to it, and repetitive “pulses”.
This tutorial is actually split into 6 parts, otherwise it would have been way too long. For other tutorials, please see the following links:
Overall Set Up
This is the most complex part of the tutorial as it involves few effects stacked on top of each other across various layers. There is certain order of manipulations of layers to get mattes working, to make sure “swarm” disappears from the display after short while.
Looped Keyframes
Looping Animation – LoopOut
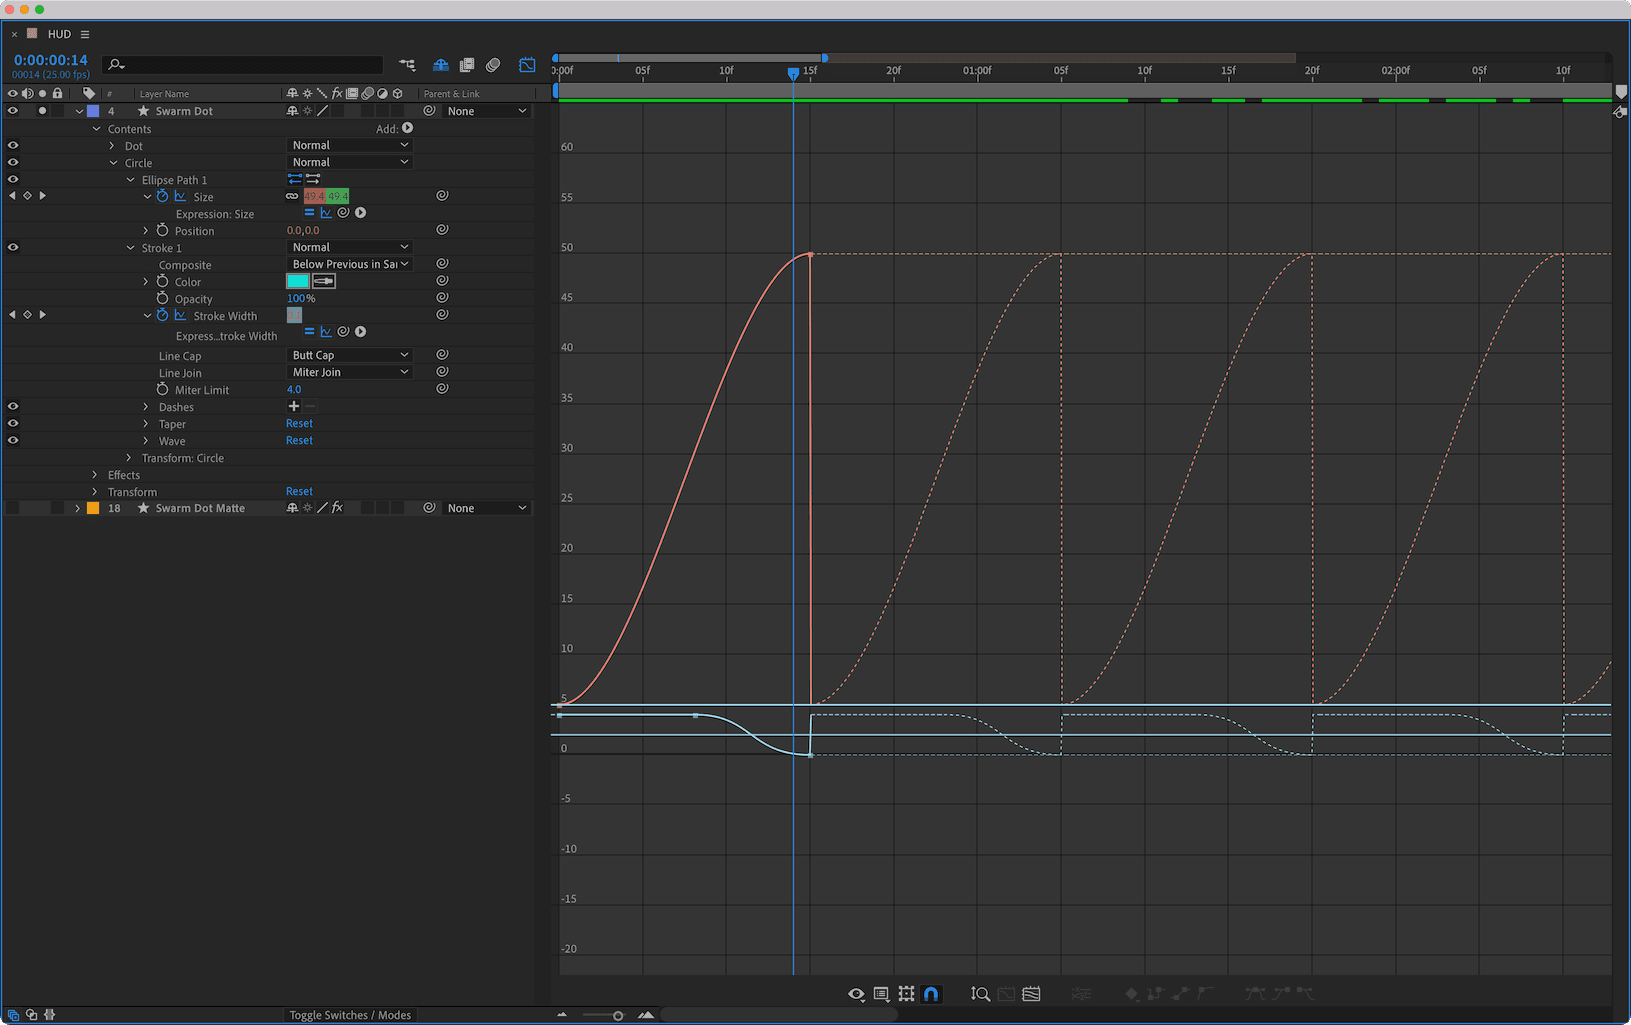
LoopOut to loop animations is pretty simple concept. But in this case, I’m using 2x LoopOut expressions on 2 properties. The trick is that I’m overlapping values, to give an illusion of continuous pulse effect.
You can see this in the preview of expression on both properties – Dot reaches max size and in the same time, Stroke goes to 0. And then animation repeats itself, to sell illusion of constant pulse.
Simple, but very effective.
Position – Wiggle
This is more “complex” version of wiggle. Usually, we use only 2 first properties – Frequency and Amplitude. But wiggle has 5 properties:
- Frequency – How often it moves
- Amplitude – How much it moves in pixels
- Octaves – Noise in the movement
- Amplitude Multiplier – How much movement is multiplied with each octave
- Time – Base start time
In this animation, I decided to use more complex wiggle, to add more randomness in the motion.
Swarm Matte – Size
For Swarm Dot Matte, we are reusing Circle shape layer. Since it is already set up, we can reuse Position, Anchor Point and Size expressions. They are the same.
To be honest, to save on processing time, you can simply pickwhip and link those properties to “master” Circle shape layer.
Swarm Matte – Stroke Width
This expression is very similar to “master” Circle Stroke expression. However, it has Swarm Fall Off added variable. We can use this variable to control how strong the falloff of detection is.
In other words, we can control if Swarm Dots disappear quickly or slowly.
Swarm Matte – Offset
By adding this expression to Offset Paths – Amount property, we are “shifting” matte inwards. Simply making the shape thicker, but inwards. This way, we can use it as a “trailing” matte, behind visible radar Circle path.
Rest of expressions are pretty simple – linked to other effects or properties with pickwhip. Simply link relevant properties to make sure number of Echos, for example, is the same on “master” Circle shape layer and Swarm Matte.


This project file contains all the assets necessary to make animation in the tutorial in final form. Everything is labeled, linked, with expressions and ready to use, if you wish to make your own version or just play around with it.
If you have any suggestions for tutorials or how I can improve, please do get in touch. I would love to hear from you.